








How to Clean Your AR-15 (The Simple Way)
Keeping your AR-15 clean isn’t complicated, but it is important. A properly maintained rifle runs smoother, stays more reliable, and keeps its accuracy over time.
Carbon, powder residue, and debris build up every time you shoot. If that buildup isn’t removed regularly, it can lead to malfunctions, excess wear, and reduced performance at the range.
The good news is that cleaning your AR-15 only takes a little time once you understand the basics.
Below is a simple step-by-step guide to help you keep your rifle running the way it should.
Why Cleaning Your AR-15 Matters
Every round fired leaves behind carbon fouling and residue inside your rifle. Over time this buildup can affect how the rifle cycles and performs.
Regular cleaning helps:
• Maintain reliability
• Protect internal components
• Preserve accuracy
• Extend the life of your rifle
A well-maintained AR-15 is simply more dependable when it matters.
Basic Tools You’ll Need
Before getting started, it helps to have the right cleaning tools ready. Using proper tools makes the job faster and prevents unnecessary wear on your firearm.
Most shooters use:
• Bore brush and cleaning rod
• Cleaning patches
• Gun solvent
• Gun oil or lubricant
• Nylon brush
• Microfiber cloth or rag
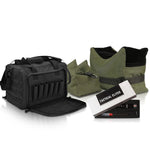
Many shooters prefer keeping everything together in a dedicated gun cleaning kit so it’s ready whenever they get back from the range.
Step 1: Make Sure the Rifle Is Unloaded
Safety always comes first.
Before cleaning your rifle:
-
Remove the magazine.
-
Lock the bolt to the rear.
-
Visually inspect the chamber to confirm the rifle is unloaded.
Once you’ve confirmed the firearm is clear, you’re ready to begin disassembly.
Step 2: Separate the Upper and Lower Receivers
Field stripping an AR-15 is simple.
Push out the rear takedown pin and pivot the upper receiver forward. If needed, push the front pin out as well to completely separate the upper and lower receivers.
This gives you access to the internal components that need cleaning.
Step 3: Remove the Bolt Carrier Group and Charging Handle
Pull the charging handle back and remove the bolt carrier group from the upper receiver.
Then slide the charging handle out as well.
These parts collect the most carbon buildup and will require the most attention during cleaning.
Step 4: Clean the Barrel
The barrel plays a major role in accuracy, so it’s important to keep it free from fouling.
Apply solvent to a bore brush and run it through the barrel from the chamber toward the muzzle. Follow up with clean patches until they come out mostly clean.
Repeat as necessary until residue and fouling are removed.
Step 5: Clean the Bolt Carrier Group
The bolt carrier group is where most carbon buildup occurs.
Disassemble the bolt carrier group and clean the following components:
• Bolt
• Bolt carrier
• Firing pin
• Cam pin
Use solvent and a nylon brush to remove carbon buildup. Pay extra attention to the bolt face and locking lugs where residue often collects.
Once clean, wipe all parts dry.
Step 6: Clean the Upper Receiver
Next, clean the inside of the upper receiver.
Using a brush or cloth, remove carbon and debris from:
• The chamber area
• The bolt carrier rails
• The inside walls of the receiver
This helps keep the rifle cycling smoothly.
Step 7: Apply Lubrication
After everything is clean, apply a light coat of lubricant to key moving parts.
Important areas include:
• Bolt carrier rails
• Bolt exterior
• Cam pin
• Charging handle
A light coating is enough. Too much oil can attract debris and dirt.
Step 8: Reassemble the Rifle
Reassembly is simply the reverse of disassembly.
Insert the charging handle back into the upper receiver, reinstall the bolt carrier group, then reconnect the upper and lower receivers by pushing the takedown pins back into place.
Once assembled, perform a quick function check to ensure everything operates properly.
How Often Should You Clean Your AR-15?
Cleaning frequency depends on how often you shoot and the conditions you shoot in.
As a general rule:
• Clean after every range session
• Clean after several hundred rounds
• Clean sooner if shooting in dusty or dirty environments
Regular maintenance helps prevent problems before they start.
Final Thoughts
Taking care of your rifle doesn’t require complicated tools or hours of work. With the right gear and a consistent routine, cleaning your AR-15 becomes quick and easy.
A well-maintained rifle runs smoother, lasts longer, and stays ready for your next range day.